Saturday, December 31, 2011

Happy New Year 2012!!


To all my loyal followers and occasional visitors,
may the year ahead be filled with much joy,
little sadness and many wonderful memories to treasure.

l am taking a little blogging break, as is my habit at this time of the year,
 but rest assured, l will be back, refreshed and reinvigorated.
And with new quilting adventures to inspire!!


Thanks for your friendship this year.
And thanks for visiting.

Linda.


Friday, December 23, 2011

l have a thing for SANTA!

My house is being taken over by Santa's!!
My Xmas tree is covered in them!!
Here is a small collection.


Lots of different resin Santa's.


l have a dozen's of  different one's of these all over the tree.

Hand painted Santa's.
This one was bought in Austria.


Wood Santa's.

Glass Santa's.


Then we have the Santa candle holder.


A pewter Santa.


Hand made Santa's.


Candle Santa's.

Santa's bought at craft market's.

Hand stitched Santa's.

Santa Head's.

l even buy Christmas cards with Santa on them.

Then there is my collection of Jim Shore Santa's.


This is my kitchen dresser, full of Santa's.

And more Santa's here.

The lovely Santa at the back came home from Houston with me.

Even my girlfriends have got in on the act.
The blue, red and green Santa's were hand made for me as special gifts.
l treasure them!!

And last year Bev stitched this Santa for me. Another treasure.

l wonder what Santa will be added to my collection next?

Thanks for visiting.
Linda.

P.S. Only 2 more sleeps till the REAL Santa comes!!!


Thursday, December 22, 2011

Secret Christmas Sewing


There has been some secret Christmas sewing going on around here,
and now that the last has been gifted, l can show you.


Remember back here l showed you the tree skirts l was making?
Well, here is the mini one, all quilted and bound. Its now living at my girlfriends house,
under one of her many, many  Xmas trees!!!


My larger one is also quilted, ( thanks Deb) bound and under our tree. 

l am so thrilled with it!! Our tree looks perfect in my eye's now.


Then l made a dozen of these,
 and have slowly been gifting them to girlfriends.
l have about 4 left for myself. These measure 5"finished.


While l had the red and white out, l made 3 larger small quilts.
These are also living in their new homes now, the last being gifted today.
These measure about 12" finished.
Just perfect for a dolls bed, or to hang on the wall.

l was very tempted to keep one for myself!!

They look pretty cute all together.

Here they are with the mini tree skirt.


Its not all been gifting.
 l have also received an early Christmas gift.
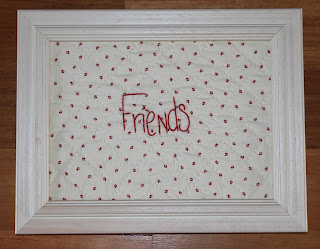
This charming framed stitchery from Bev.
Beautifully hand quilted, its very special.


Thanks for visiting.
Linda.


Wednesday, December 21, 2011

Early birthday gift


Lucky me!! Look what came in the mail last week.
An early birthday present from my dear friend Randi,
 all the way from Norway. Almost to pretty to open!!


And look what was inside!!
A beautiful card, pack of fabrics and a Quiltmania diary for next year.
Randi writes, "these are to remind me of our upcoming trip  to France next year in spring"
 And they most certainly do!!"


Look how soft and pretty these fabrics are.


l know just what l am going to make with them, to take on our trip together!!


Thank you Randi!! l can hardly wait for your spring next year,
and look forward to our adventures together in France.

Thanks for visiting.
Linda.


Thursday, December 15, 2011

Christmas twister quilt and a bonus quilt!!


Remember when l made Harpers twister quilt here?
Many of you asked how? And l promised soon!!
Yesterday l had a free day, so l decided now was the time.
Out came some Xmas fabrics and l whipped this one up.
Here is a tutorial showing how!!


First, l chose 16 different fabrics, and cut 7 1/2"squares from each.
You don't need to use this many fabrics, but l did.
You can see l alternated red and green.

Sew your 16 squares together in a pattern that pleases you.
Press well.

l then added a red border. l cut these border strips at 4 1/2".
Measure your top, cut strips to suit, then adding a strip to each side.


Now comes the magic. There is a ruler available on the market called twister,
but l converted an existing 4 1/2"ruler.
l drew black lines from the 3/4"line on either side to the opposite 3/4"mark.
Once l had drawn these lines, l covered them with sticky tape,
 so they would not rub off. This does not affect the ruler.
Place the ruler, with the black lines lining up with your sewing seam lines,
 and cut on all four sides. This is best done on the corner of a table,
with the quilt spread out on the table in front of you.
It can be tricky to get to each side, but persevere.
l found l could cut 3 sides, then needed to swap where l was standing.

Continue cutting across the top row. You can see here how they will look.
You can see the pinwheel blades starting to form.

Then give the cut blocks a slight twist to their new position.

Continue cutting rows.
Remember, these squares are now on the bias, and need to be handled carefully.
Once l have cut a block, l add it to its new position. If you left this till the end,
it would be like putting a jigsaw puzzle together.

You can see here, how the 4 lines line up with the stitching lines.
As you cut your blocks, you will find there is some big
 chunks of fabric left over, but wait and see!!

Here are all the blocks cut and in their new positions.

Sew them together in rows, then sew the rows together.
l pressed each row in alternate directions to help with the seams nesting.

Now your centre is complete. Press well.


l decided to add a border.
l cut my strips at 4 1/2", adding to all 4 sides.
Now your top is complete. Quilt as desired.

Remember those left over scraps? l trimmed them up to 4 1/2"squares.
Again,  remember they are on the bias, so be careful.
l then sewed them all back together, which is where we all started,
 added a red border, then a larger 2nd border.

So from those 7 1/2"squares that you start with, you have 2 small Xmas quilts.
l hope this all makes sense, and you enjoy making a twister quilt and a bonus quilt.

Thanks for visiting.
Linda.